Continuity mistake: When Joker's goons return from Operation Laundry Bag and finally release Penguin from the bag, Penguin's hat is secured on his head with an elastic strap, but this strap vanishes in the next shot.(00:04:30)
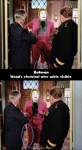
Visible crew/equipment: When Batman and Robin bring Venus to the Batcave, just as she says, "It's fabulous," the reflection of the moving boom pole/mic is visible on one of the Bat-computer screens, at the bottom right corner of the screen. As this shot continues, when Robin points out their Bat-radar, a chalk T-mark is visible on the floor near Batman's foot. Then, when Penguin, Joker, and the goons appear, more chalk T-marks are visible on their side of the floor.(00:17:10)
Revealing mistake: When Joker pays another visit to Commissioner Gordon and Chief O'Hara, Joker's holding his wand, and in the shots from outside the GCPD office window we can see the wire cable dragging behind Joker, which is attached to the wand and providing its power. During these shots, the actors' small white tape markers are also visible on the rug, beside the Batphone table.(00:03:00)
Revealing mistake: When Joker enters Commissioner Gordon's office at GCPD, he's pointing a wand at Gordon and Chief O'Hara. In the shot facing Joker when he lets go of the wand, the wires at both ends of the wand are visible.(00:01:15)
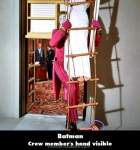
Visible crew/equipment: After Joker has stolen the map from Commissioner Gordon's office, he rushes to the window and calls for Venus, then just as Joker places his foot onto the lowest ladder rung, we can see a crew member's hand holding the same rung near Joker's foot, at the bottom of the screen.(00:02:05)
Continuity mistake: In Commissioner Gordon's office, after Batman uses his handy mini fire extinguisher to extinguish Joker's flaming 2-way spy device, when he walks over to Gordon's desk the mini fire extinguisher is in his left hand, but when it cuts to the closeup as he realises the significance of RAM, the fire extinguisher is suddenly in his raised right hand.(00:06:50)
Revealing mistake: After Joker's goons kidnap Crustash, the opera singer, Penguin tries to sneak off, and when Batman and Robin use javelins to capture Penguin, the glistening stunt wire attached to the javelin is visible in the wide shot.(00:18:15)
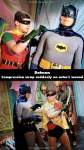
Visible crew/equipment: When Mad Hatter has Batman's pink cowl he enjoys his short sweet victory. In the next shot the Dynamic Duo walk in, and at the end of this shot the actor's chalk mark is visible on the floor at Mad Hatter's feet. Then as the goons nab Robin and Batman, more chalk T-marks are visible on the floor.(00:22:45)
Visible crew/equipment: When Alfred and Batman take off from the Batcave on the Alf-cycle (a nod to Batman's quick head-dip), it cuts to the exterior scene at the Run Down Factory. When the GCPD patrol car pulls up, in their closeup the movement of a crew member's reflection is visible on the triangle vent mirror, at the bottom left side of the screen.(00:10:30)
Revealing mistake: While The Puzzler and his baddies are at Artemus Knab's penthouse, across the street from Commissioner Gordon's office, when Puzzler decides he will launch the plane himself, the wire attached to the top of the plane is visible.(00:01:15)
Revealing mistake: At the old balloon factory, when Puzzler throws the model airplane with a poison tip at Batman, on his upper arm we can see the protruding outline of the rectangular base to which the small airplane is attached.(00:22:00)
Visible crew/equipment: At the Knab Aircraft hangar Puzzler arrives in the truck just as Knab is leaving, and when Puzzler walks to the back of the truck the reflection of the boom mic is visible on the right back door windows.(00:14:45)
Visible crew/equipment: While Allan Stevens interviews Batman and Robin they have surprise visitors, and as Catwoman and her Kittens take their places pointing the weapons at the audience, the black tape mark is visible on the floor at Catwoman's feet.(00:06:45)
Visible crew/equipment: After Batman and Robin have "set another youth on the road to a brighter tomorrow," they walk away from Andy, then when they stand beside the Batmobile, the vertical reflection of the moving boom pole/mic is visible right beside Robin's reflection, on the left side of the windshield.(00:03:50)
Revealing mistake: After Shame and his baddies steal Bruce's limo. Bruce shows Dick and Alfred that he had the remote control unit keep the Bat-cycle (with Alf-cycle) following them at a safe distance. In the shots facing the Bat-cycle, attached to the front wheel there's a rope pulling it.(00:17:05)
Continuity mistake: After Batman has been hit by Marsha's love dart, when Robin pulls the dart out and then begs Batman to resist it, in these semi closeups note Burt Ward's uncovered forearm with his still-healing burn wound. Then, while the Dynamic Duo fight Marsha's sabre wielding goons, Marsha hits Robin with another one of her darts and orders him to attack Batman. When this happens, Burt Ward's forearm now has a compression bandage around the wound.(00:13:55)
Continuity mistake: While Joker and his baddies are in the vent shaft at the waterworks, Joker takes out the envelope and holds the envelope with his left palm up, but in the closeup his left palm is down as he pours the pills into his right hand.(00:14:50)
Visible crew/equipment: After Bruce defeats the radar egg using a grape it cuts to Commissioner Gordon at the raccoon pellet ceremony, and when the millionaires walk in, there are two chalk T-marks visible on the floor, beside Chief Screaming Chicken.
Visible crew/equipment: After the Dynamic Duo climb up the side of the building they enter through the window, and a chalk T-mark is visible on the floor where Batman stops when he sees Clock King sitting at a desk. Then, as Batman and Robin slide around on the floor coated with watch oil, when Clock King stands up we can also see the curved chalk mark on the floor by his feet.(00:21:50)
Continuity mistake: When Clock King steals his favorite painting from the gallery, as he places it through the wall hole note the strips of tape adhered to the paintings back, and its hanging wire near the bottom (it's upside down). In the next shot from the other side of the wall hole, the painting is now turned the opposite way (it's right side up), note the tape strips.(00:16:25)
Separate from membership, this is to get updates about mistakes in recent releases. Addresses are not passed on to any third party, and are used solely for direct communication from this site. You can unsubscribe at any time.